All Blacks vs Springboks: How to Beat the Rush Defence
23 Sept 2019
4 min Read
By Tony Sprangers
Content Lead
The first major encounter in the 2019 Rugby World Cup featured the 2011 and 2015 champions New Zealand, against a South Africa side fresh off winning the Rugby Championship.
We delve into the statistics to look at how both South Africa looked to stifle the All Blacks and the style of play the New Zealand employed to counter this.
Quick ball vs slow ball. How wide did New Zealand set their runners and what effect did this have?
The above output window using Hudl Sportscode technology shows the attack map for New Zealand.
The attack map is a representation of a team’s width in attack. (How far target of the pass is set in relation to the source of possession).
New Zealand knew South Africa were coming with aggressive line speed to disrupt the width in their attack so if they attacked in wider channels they would be playing into the South African rush defence. (As happened in the 16-all draw in the Rugby Championship).
During the Rugby Championship New Zealand averaged 15m in attack width. Yesterday, they averaged 10m attack width.
The bar graph above illustrates how New Zealand set targets closer to the ruck on slow ball to prevent South Africa from using their aggressive line speed and making tackles on them behind the gain line.
53% of New Zealand's slow ball was played within 10m of the ruck.
This slow ball tactic allowed them to set pods closer to the ruck to get over the gain line and create momentum from slow ball, basically earning the right to go wide. Playing a more typical style of passing to a pod wider off the ruck is much harder against the rush defence. This is a lesson that was learned during encounters between the two sides during the Rugby Championship where New Zealand struggled against the rush.
On quicker ball, New Zealand were then able to attack the space created either by the inside pass off 10 or the kick pass to the far wing.
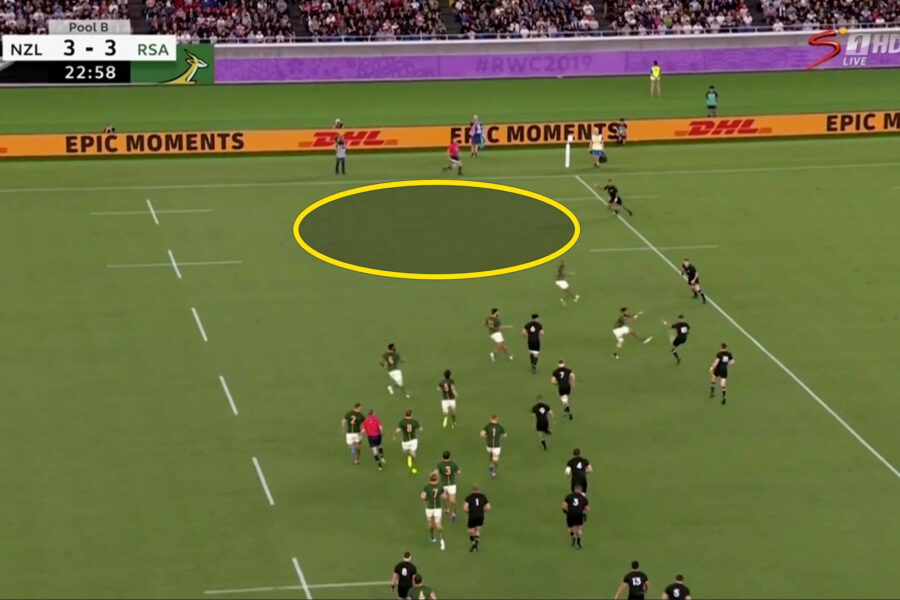
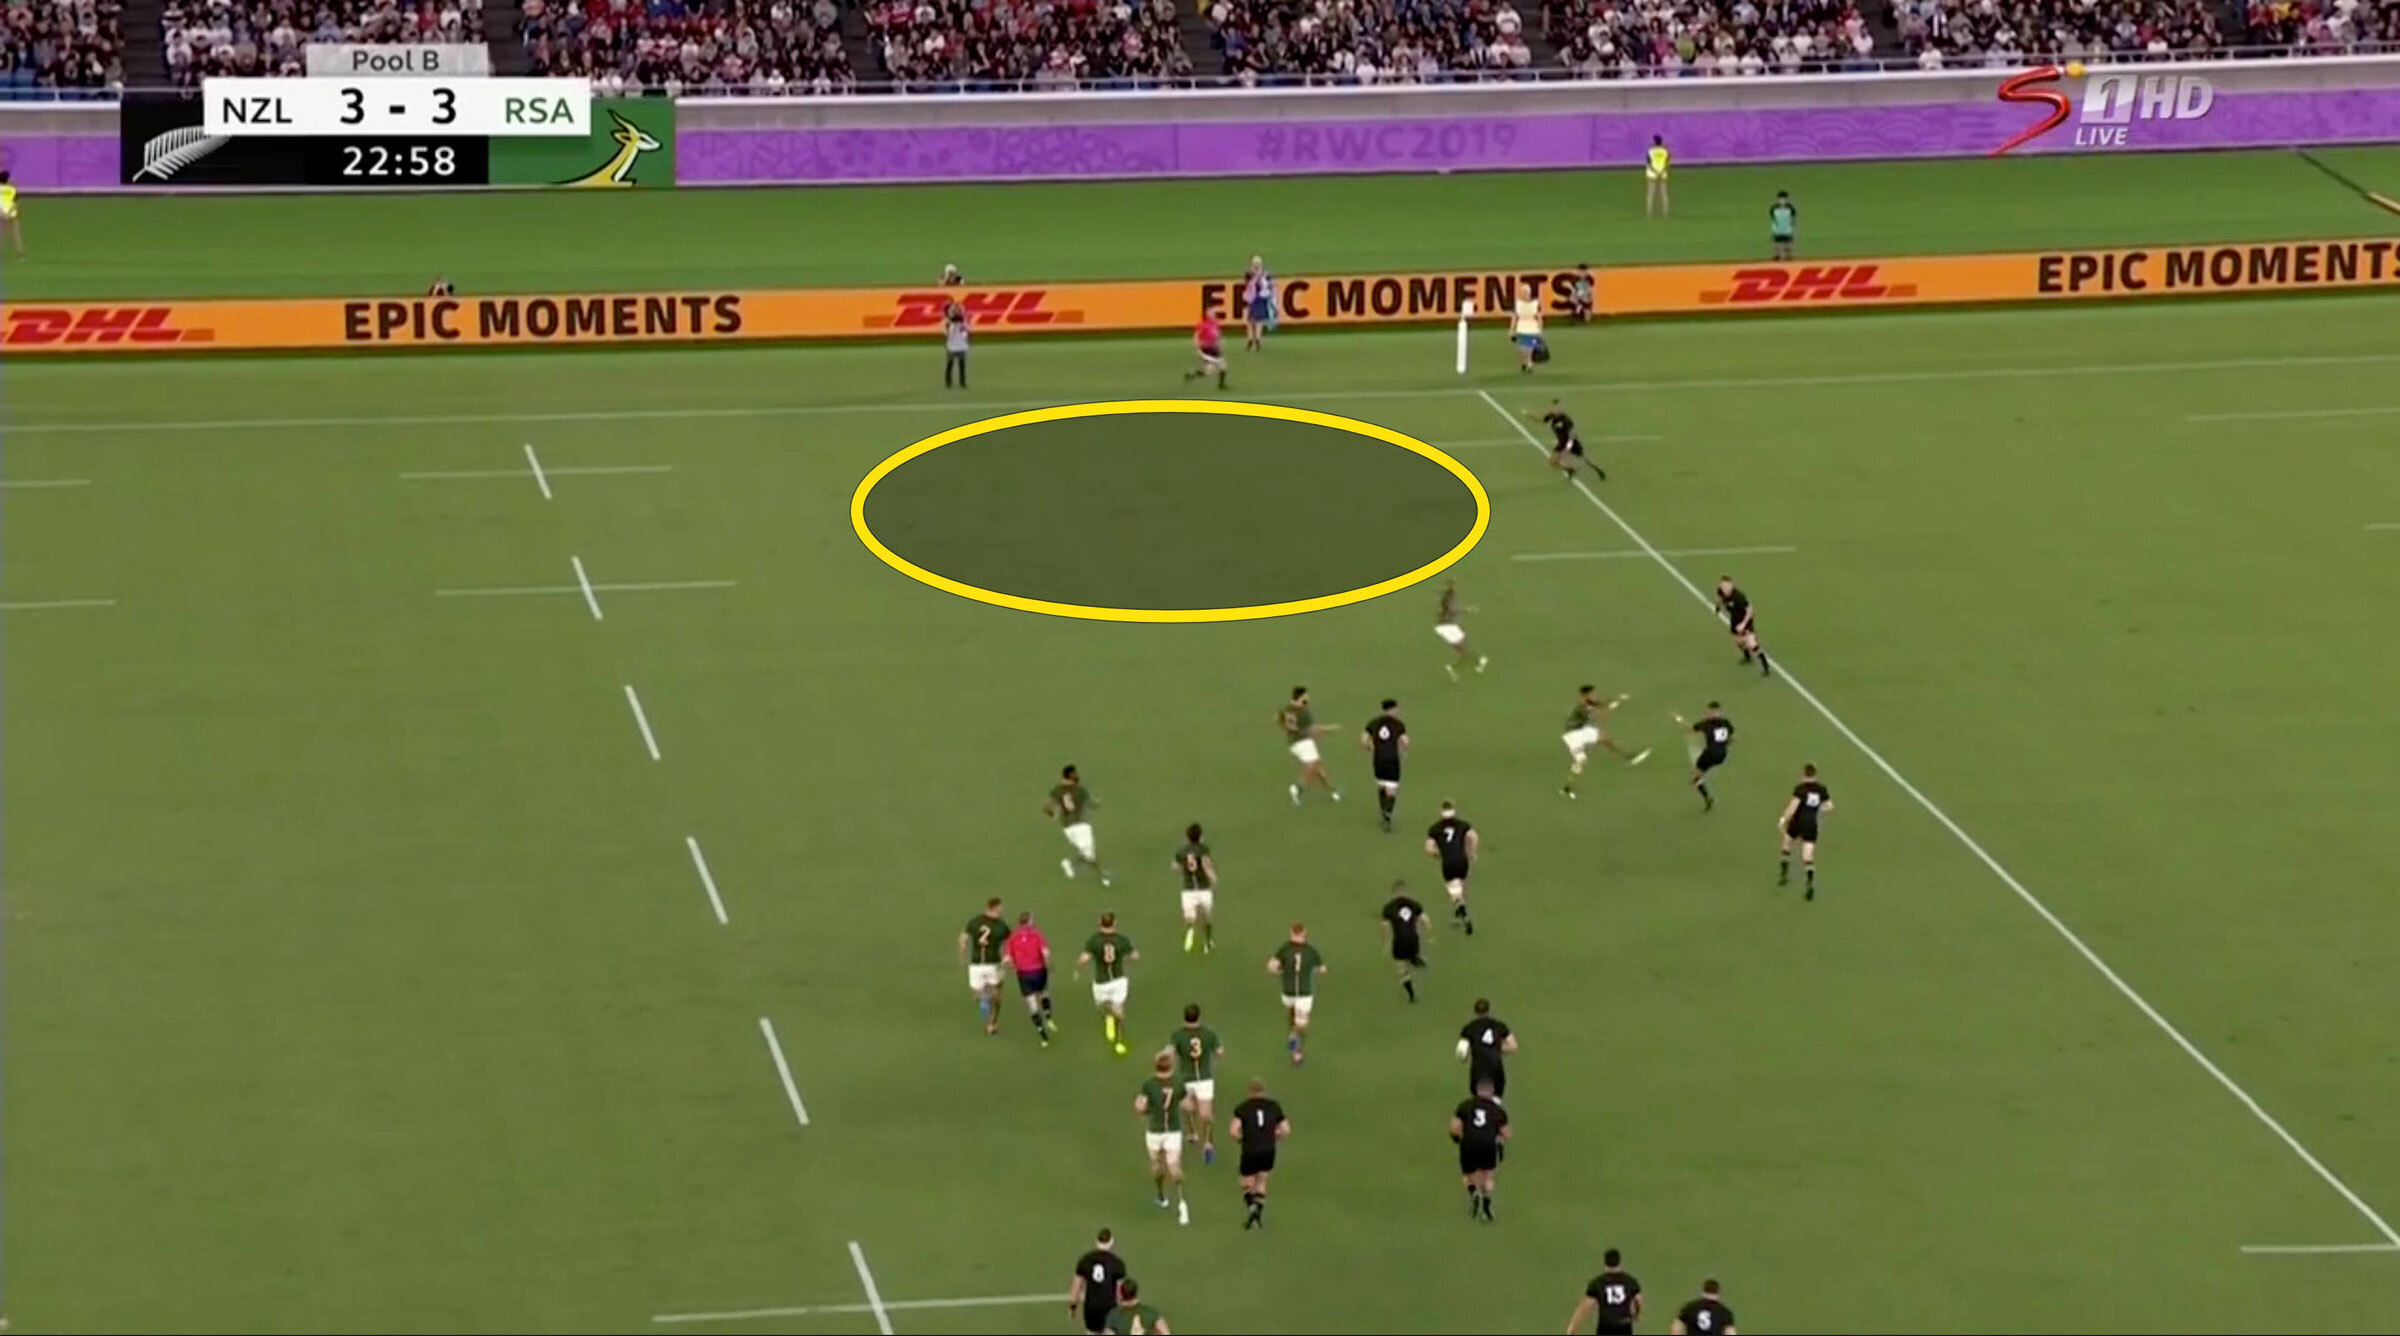
The chain of events that led to the All Black's first try came when Richie Mo'unga found winger Sevu Reece in space with a cross kick in behind the rush.
An aggressive line speed will always be vulnerable to quick ball due to less time for the defensive line to be organised.
Getting on the outside: Richie Mo'unga exposes the area behind the rush defence with a well-timed cross kick.
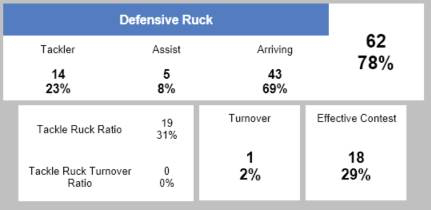
South Africa defensive ruck analysis
South Africa began the game at an intense pace, committing numbers to the breakdown and bringing aggressive line speed to unsettle the All Blacks attacking fluency. However, this tactic required a level of accuracy much higher than what the Springboks offered on the day.
South Africa contested over two thirds of all rucks.
South Africa had a very low return with only one turnover won.
For all of their commitment, South Africa only executed five Double Tackles and 25% tackle dominance, which meant New Zealand were able to get momentum on attack and also offload the ball.
New Zealand completed eight offloads to South Africa's two.
South Africa missed seven more tackles than New Zealand while also conceding five more penalties.
Despite a fast start, one turnover and a 29% ruck efficiency was not enough to trouble the All Black attacking structure over 80 minutes.
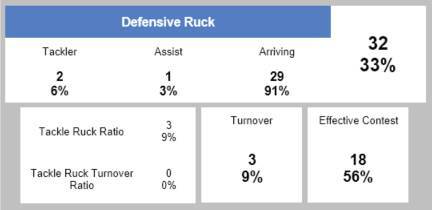
New Zealand defensive ruck analysis in comparison
The All Blacks were in contrast, more than happy to leave the ball alone in the ruck on most occasions.
New Zealand only contested 33% of defensive rucks.
They rather chose to have more players in defensive line for the next defensive phase.
New Zealand got a great return from contesting defensive rucks with 56% accuracy and thus preventing quick South African ball.
New Zealand completed 22 double tackles – greatly affecting South Africa's ability to offload in the tackle and create quick second phase ball.
75% of New Zealand tackles were dominant tackles.
All of the above variables combined to stop the South African attack from gaining momentum and allowed New Zealand to absorb the South African attack for large periods of the game without conceding as many points and penalties.
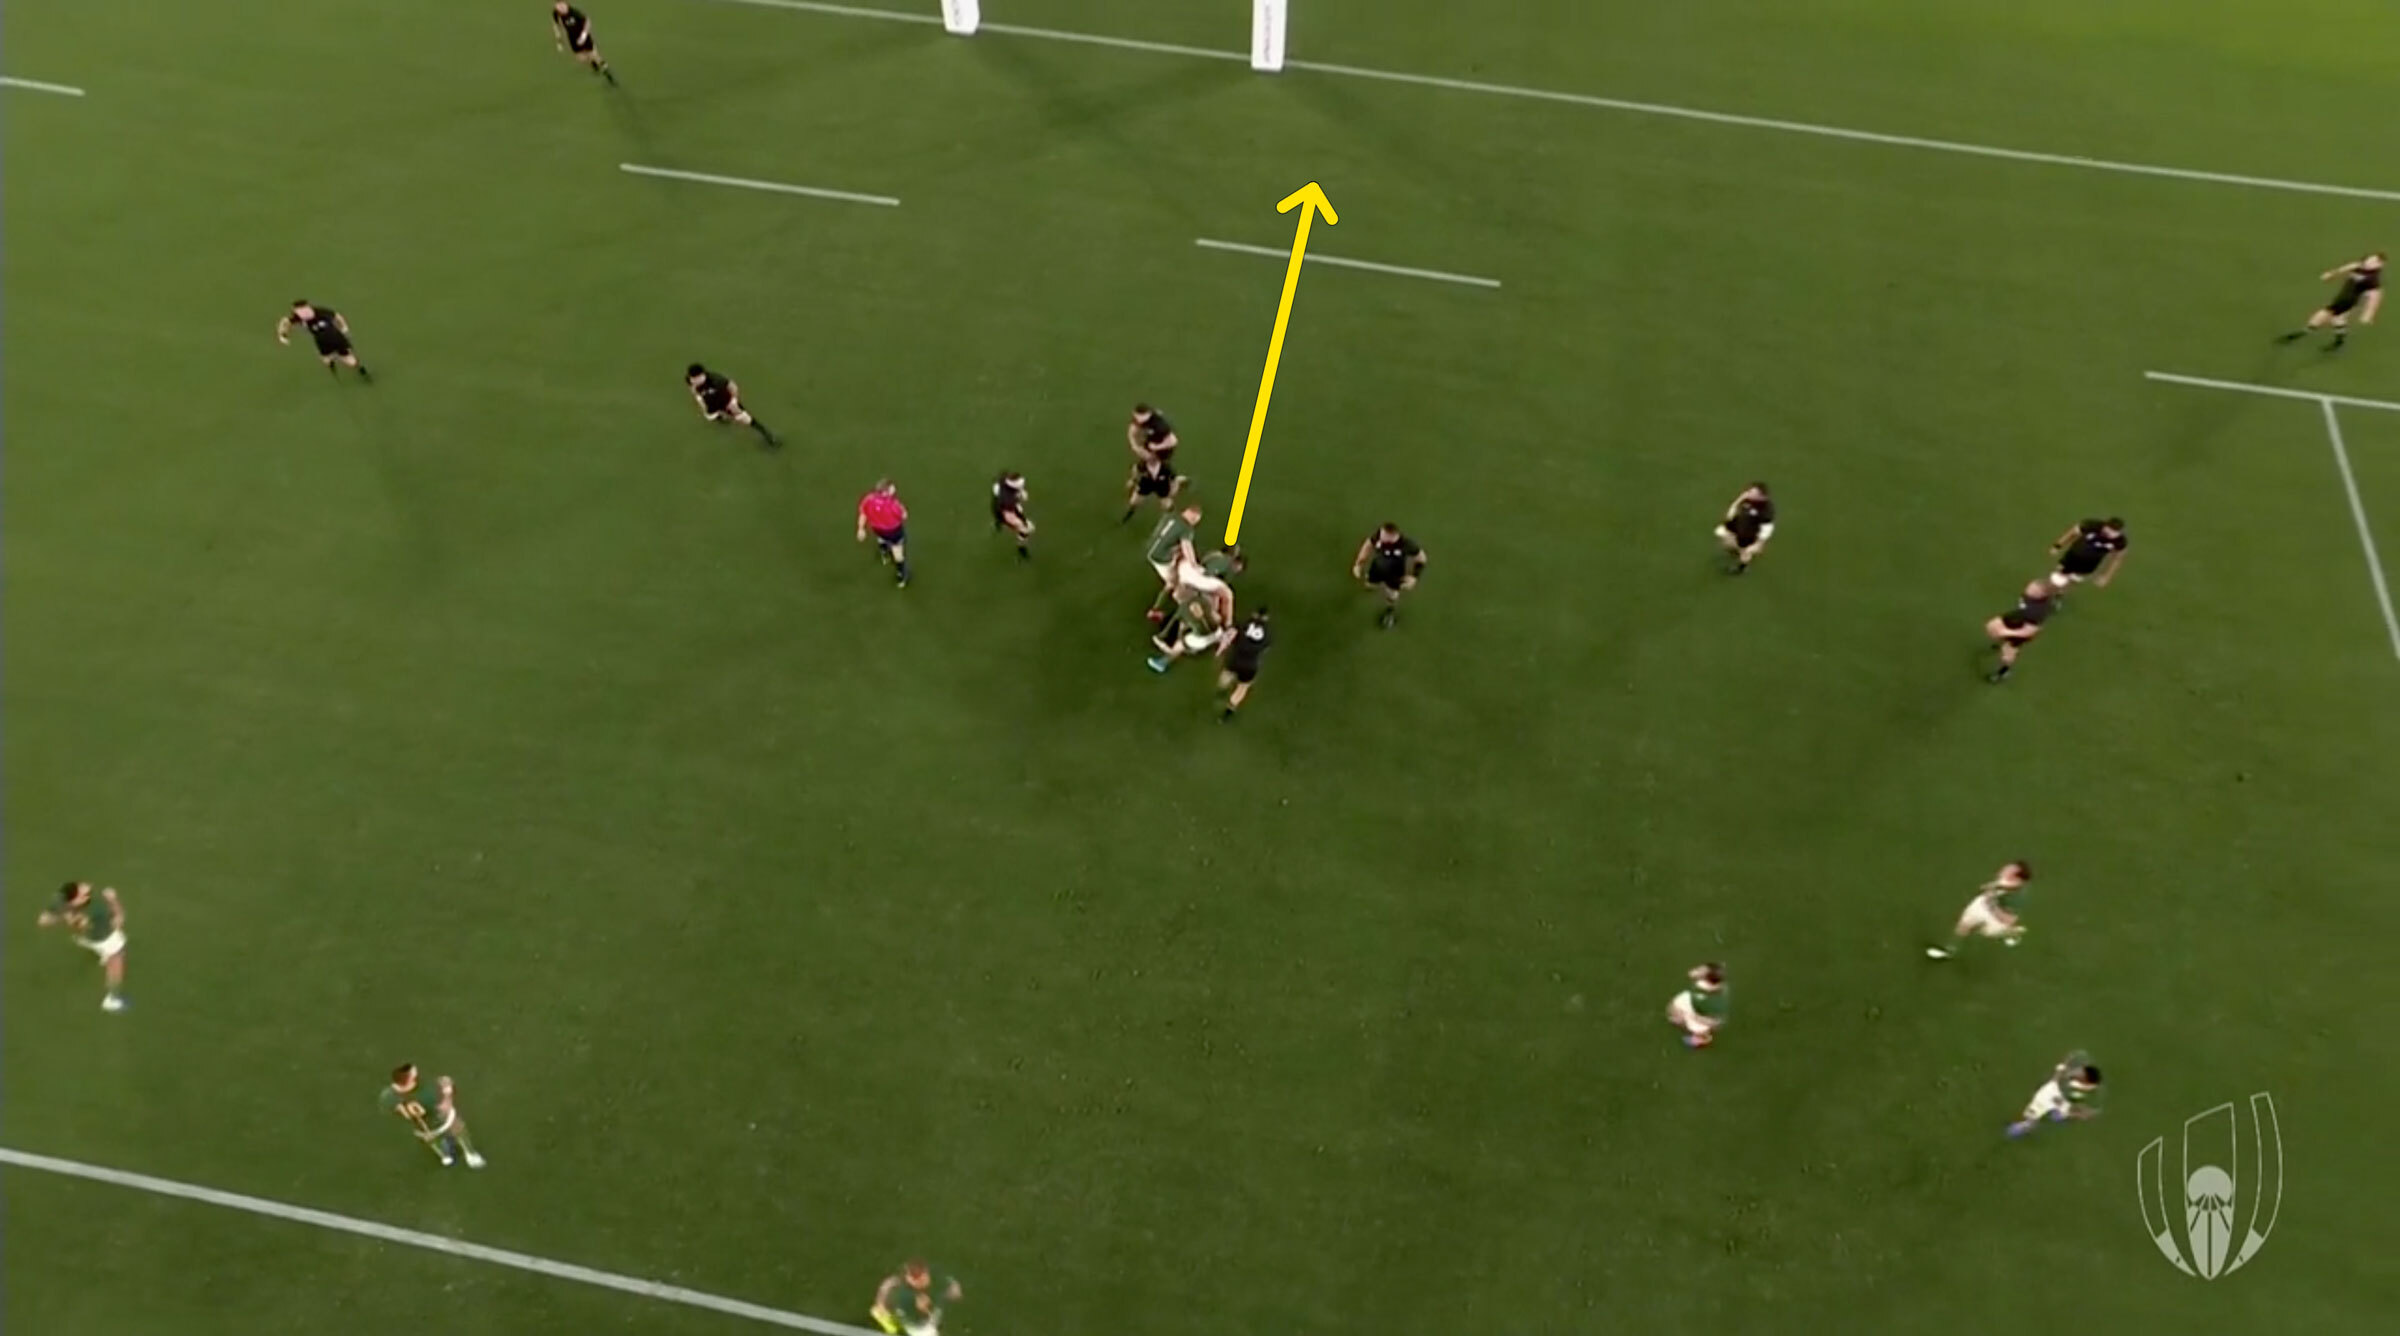
However, South Africa's first try to Pieter-Steph du Toit came as a result of New Zealand under-committing to the ruck in the danger zone and leaving space in the guard area.
In comparison to their opponents, New Zealand gained three turnovers and yielded a higher ruck efficiency of 56%.
New Zealand under-commit to the ruck that leads to Pieter-Steph du Toit's try.
Conclusion
South Africa's fast start did appear to have the All Blacks rattled momentarily, but they only came away with three points to show for their early period of dominance. Handre Pollard's missed penalty during this early period to make the score 6-0 was a momentum turner, as not long after, the All Blacks capitalised on a couple of Springbok errors to make the score 17-3.
South Africa missed seven more tackles than New Zealand while also conceding five more penalties. To bank on your defensive pressure to force errors and score points, much greater discipline and accuracy is needed both in the breakdown and in the open field.